Truly the Best Cinnamon Rolls~ Ever

Print Friendly Version of this pagePrint Get a PDF version of this webpagePDF

Often I don't think of posting a recipe I find on another blog if I don't alter it noticably, especially if it is quite popular or has been seen many other places. But I am making an exception because I think everyone is in need of the absolutely best cinnamon roll recipe. And this is it!

In my quest for the best cinnamon roll from scratch, I happened upon a post on Pinterest that claimed to be the recipe for the best cinnamon roll. Thankfully there were many comments from those who had actually used the recipe. They weren't necessarily negative comments but they were enough to push me to continue my search. Yay for me! And thank you Kaitlyn for posting the recipe that really wowed me.


It isn't as if this is a hidden recipe. Actually the original source is allrecipes.com.  I have probably even seen it before since it is highly rated and reviewed on that site.  But for some reason, I had not tried it before.  I have made cinnamon rolls a few times but was never wowed. I even gave up and decided to make a cinnamon roll bread that is no knead.  I like it. It is good.  It's texture is nice.  But I enjoy the satisfaction of actually make a cinnamon roll.

I did make a few changes to the recipe.  Some are very slight changes such as the amount of flour and yeast.  The most noticeable change is simply that I doubled the amount of frosting.  I like more than a slight slather of frosting with my cinnamon rolls.  If you like yours lighter, just half the frosting ingredients.

The filling alone in these is soooo good {you can't go wrong with butter, brown sugar and cinnamon}, it's almost too difficult to decide whether to have them frosted or not.

The Best Cinnamon Rolls Ever
from Kaitlyn Cooks, original from allrecipes.com
1 c milk
1/2 c white sugar
3 tsp yeast
1/3 c butter, melted
2 lg eggs, room temperature
1 tsp salt
4 1/2 ~ 5 1/2 c flour

For Filling
1/3 cup butter, softened
1 c brown sugar*
3 tsp cinnamon

For Frosting
8 oz cream cheese
2 c powdered sugar
2 tsp vanilla
3 tbsp milk

Warm 1 cup of milk to about 115~120F. Place 1/2 cup sugar in bowl of mixer and add milk; stir. Sprinkle yeast on top and stir lightly. Let sit for 5 minutes til foamy {yeast is now activated}. Add butter, eggs and salt to yeast mixture; stir.  Add 2 cups of flour; stir with paddle attachment.  Add another cup of flour and stir.  Switch to dough hook and add the fourth cup of flour.  Knead for a minute; continue to add dough, 1/2 cup at a time, and knead until dough is smooth and not sticky {about 10 minutes of kneading with dough hook}.  Shape dough into a ball and place in a greased glass bowl.  Cover with plastic wrap and place in warm place to rise for 1 hour and 30 minutes.

Roll dough out to about 16x20 inches.  Spread 1/3 c softened butter onto dough.  Combine brown sugar and cinnamon; top buttered dough with cinnamon and brown sugar mix.  Roll from the long edge.  Cut dough into twelve equal pieces.  Transfer to a greased 9x13" baking dish.  Cover with plastic wrap and let rise for 45 minutes.

Preheat oven to 400F.  Bake rolls for 18~20 minutes {unless you like a bit more gooey on the inside, then cut time to 15 minutes}, until golden brown.  While baking, make frosting.  Place softened cream cheese in bowl of stand mixer; blend til smooth.  Add powdered sugar, vanilla and milk.  Mix well, til no lumps are found.  Spoon over warm rolls.

*I suggest light brown sugar, though either dark or light may be used.  Dark brown sugar has a more intense molasses flavor.

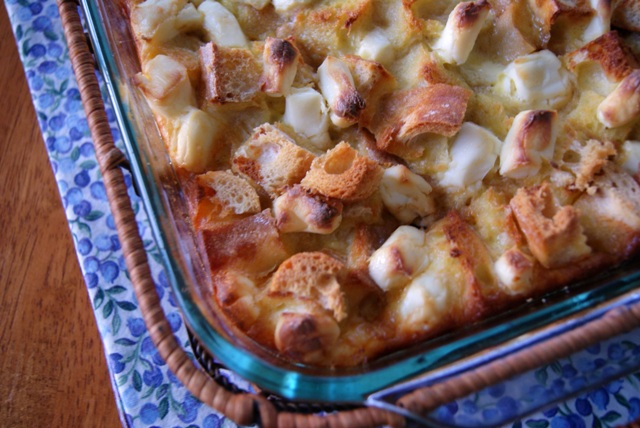
The filling is so plentiful that it overflows its spiral housing while it's baked.

Tips and Tricks~
*Have all your ingredients ready~ eggs cracked and ready to use {at room temperature}, butter melted, and sugar in mixing bowl. As the milk and sugar and yeast sit, the temperature will quickly decrease. In order for the yeast to work well in the whole recipe, you want the ingredients to stay warm.
*The original recipe calls for 4 1/2 cups of flour.  I found that each time I have made these, I really need 5 ~ 5 1/2 cups of flour.  Once you have added 4 cups, just watch the dough as you add more, only 1/2 cup at a time.
*The dough doesn't rise a bunch like bread dough, so just let it rise for 1 hour and 30 minutes.  It will be noticeable, but I wouldn't say that it really doubles in size.
*Use very soft butter, almost melted, for spreading on the dough for the filling.  You want it to spread easily.
*Use floss to cut the rolls.  Slide the floss under the rolled dough, bring the strings to the top and cross, then pull quickly to cut through the dough smoothly and without smooshing it.
*When rolling dough out, place the 9x13" baking dish next to it.  You want your dough to roll out a bit larger than the dish.
*To make these ahead, follow directions to the point of rolling, slicing and placing in baking dish.  Instead of letting rise again, cover dish with plastic wrap and put in the refrigerator.  Take out and let sit on counter for 15 minutes.  Place dish in oven and preheat {while the dish is in it}.  Once the oven is preheated, bake for 18 ~ 20 minutes.
*For a less intense cream cheese flavor, add 1/2 cup of softened butter to the softened cream cheese.  Blend til smooth.  Add an additional 1/2 cup powdered sugar to the frosting and mix as directed.  I actually prefer this frosting; it is superb.

Pin It

Crab Cake Sliders

Print Friendly Version of this pagePrint Get a PDF version of this webpagePDF


The first time I ever made crab cakes from scratch, I used this recipe from Ina Garten {who has fabulous recipes}.  It is the only crab cake recipe I have ever used. And, I can say it will probably be the only I will ever use.  It is scrumptious.  Flavored by veggies, without a lot of filler, these are ever so tasty and moist.

A few notes about making these.  I have doubled the crab meat but only slightly increased some of the other ingredients, specifically the bread crumbs.  Thus, the mixture is very moist and can fall apart easily when pan frying.  Just trust me.  Pat the moist ingredient into balls and flatten slightly.  Place in pan with the hot oil and butter, and let them fry for 4 minutes before flipping.  Leave room in your pan to slide a spatula underneath each crab cake and then gently flip it over.  You will be rewarded with delicious crab cakes.


These are excellent bites size for sliders, but they are also delicious made into a normal size crab cake.  Our family enjoys these as sliders, with fondue, or with pasta and a salad.  Well, our family minus my four year old.  He told me he only likes crab salad.  I encouraged him to just try them, but he had an excuse. "I've had crab cakes before at Baskin Robins in ice cream.  I didn't like them," he stated confidently.  I don't remember that, but I am certain if I had crab cakes in ice cream, I would not like them either.


Crab Cake Sliders
2 tbsp unsalted butter
2 tbsp olive oil
1 small onion, chopped
4 stalks celery, chopped
1 small orange or red bell pepper, chopped
1 small green bell pepper, chopped
1/2 tsp salt
1 tsp hot sauce {such as Tabasco}
1 tsp Worcestershire sauce
1 tsp pepper
1 1/2 tsp crab seasoning {such as Old Bay}
1 lb lump crab meat
3/4 c bread crumbs
1/2 c mayonnaise
2 tbsp Dijon mustard
1 lg egg, lightly beaten
additional 3 tbsp butter and 3 tbsp oil for pan frying
36 mini potato rolls {usually sold in packs of 24}

Melt 2 tbsp butter with 2 tbsp olive oil in large skillet over medium heat. Saute onion, celery, and bell peppers seasoned with hot sauce, Worcestershire sauce, crab seasoning, salt and pepper. Cook until vegetables are soft, about 15 minutes. Remove from heat and let cool to room temperature.

Place crab, bread crumbs, mayonnaise, mustard, egg and cooled cooked veggies in a large bowl. Mix well to combine. Refrigerate for 30 minutes to firm up slightly and make shaping crab cakes easier. After mixture is chilled, shape into bite size crab cakes.

Heat additional 3 tablespoons of butter and 3 tablespoons of olive oil in pan. Pan fry crab cakes over medium heat about 4 minutes each side. Move to plate lined with paper towel to remove excess grease.

Assemble sliders by placing a crab cake on a cut roll. Top with tartar or remoulade sauce {my personal preference}. Serve with coleslaw. To have these for a crowd ahead of time, make the crab cakes the day before. Reheat, covered with foil, in a 325F oven for about 15 minutes, then assemble.


Pin It

Cheesy Beans and Rice Burritos~ Make Ahead Lunch

Print Friendly Version of this pagePrint Get a PDF version of this webpagePDF
A few weeks ago I shared a recipe for homemade Hot Pockets, which is just about my children's favorite food.  Here is another food my children will often ask for.


I used to buy bean burritos from the frozen section at the grocery and my children loved them.  But I found out how easy and inexpensive they are to make at home. I based this recipe on ingredient amounts that are easy to remember and the ratio works well.  Now my children, especially my 11 year old son, requests these and makes certain I know he will eat more than one.


Cheesy Beans and Rice Burritos
2 15.5 oz cans pinto beans, drained
4 c cooked, cold rice
3 c shredded cheese, divided
2 c salsa {depends on how gooey you want it}
2 tsp ground cumin
1/2 tsp salt
8 10" flour tortillas

Combine beans, rice, salsa and 2 cups of cheese in frying pan.  Season with cumin and salt.  Heat, stirring occasionally.  Heat flour tortillas til warm and pliable {keeping covered with moist towel once heated helps prevent cracking}.  Spoon rice mixture onto middle of tortilla, top with a bit more cheese, fold and wrap burrito.  Wrap in foil or wax paper and store in freezer bag for future lunches.  To reheat frozen burrito, wrap in paper towel and microwave for 1-2 minutes.


Tips and Tricks~
*Heat tortillas in microwave for 1~2 minutes, keeping covered with a moist towel.  The moisture will keep the tortillas from cracking as they are rolled.
*If making these to enjoy the same day, wrap individually in foil and keep warm in crock pot.  This makes a great meal for children's parties or gatherings of any kind.
*Making these with different cheese and salsas allows for an almost infinite possibility of flavors.  Like yours spicy?  Use hot salsa and pepper~jack cheese.  Want something a bit more tangy?  Use a lime salsa and mild jack cheese.

Pin It


Peanut Butter and Jelly Cupcakes

Print Friendly Version of this pagePrint Get a PDF version of this webpagePDF

For a few years cupcakes have been all the craze. I've seen so many varieties, some which look delicious and others leave me wondering who would eat such things. The craze seems to be cooling off a bit, but that doesn't keep me from making them. My children sure like them and I'm certain would be quite disappointed if I stopped making various cupcake creations.

Sometime ago I made peanut butter cupcakes for my nephew's birthday. It was his 18th birthday,but he loved them {peanut butter and jelly sandwiches are his favorite}. I topped each with a bit of jelly before frosting them with a creamy peanut butter frosting. They were tasty, but messy. I haven't made them since, but have wanted to with some improvements. I finally got around to fixing them up. In addition, I've come across a great post on making whipped cream that would be a delicious topping for these cupcakes: Easy Ways to Make Whipped Cream.

The batter bakes up moist and fluffy with a slightly crispy top, almost like you have toasted your bread for a peanut butter and jelly sandwich.


The point of improving these was to keep them from being so messy while eating them {who wants jelly on his shirt}. That problem was solved by frosting the cupcake with just a ring of peanut butter frosting . . .


then filling the circle with jelly.


It worked beautifully.


Peanut Butter and Jelly Cupcakes
2 1/2 c flour
1 tbsp baking powder
1/2 tsp salt
2 c brown sugar
1 c peanut butter
1/4 c vegetable or canola oil
2 eggs
1 c milk
1 tsp vanilla
peanut butter frosting {recipe below}
1 c strawberry preserves

frosting recipe from allrecipes
1/2 c butter, softened
1 c creamy peanut butter
4 c powdered sugar
1/3 c whipping cream

Preheat oven to 350F.
Combine flour, baking powder and salt in bowl. Set aside.
Place sugar, peanut butter, and oil in bowl of stand mixer. Stir with paddle attachment to combine. Add eggs and beat til smooth. Add 1/3 of the flour mixture and stir to combine; while stirring, add 1/3 of the milk. Continue until all flour and milk have been adding, scraping sides of bowl between each addition. Add vanilla and blend on medium speed for 2 minutes.

Divide batter between 24 lined muffin cups. Bake in preheated oven for 18-22 minutes, until edges are golden. Cool in pans for 10 minutes; remove from pan and let cool completely before frosting.

While cupcakes are cooling, make frosting. Place butter and peanut butter in mixer bowl; whip until fluffy. Add 2 cups powdered sugar and wh1ip til fluffy. Add 1/4 c cream and beat. Add remaining powdered sugar and cream; whip til fluffy. Pipe frosting onto cooled cupcakes, just around the edge {I used a 1M tip}. Fill centers with a small spoonful of jelly.


He went straight for the jelly.


Sweet Italian Sausage and Pasta

Print Friendly Version of this pagePrint Get a PDF version of this webpagePDF

Frequently I will buy a large pack of sweet Italian sausage links knowing that they are easy to prepare for dinner.  Sadly, I often prepare the sausages the same way, always with some type of tomato sauce~ simmered in marinara sauce with peppers and onions, served over spaghetti with tomato sauce, sliced and cooked on pizza with tomato sauce.  There's a definite patter of sausage and tomato sauce.

With the a pound of sausage links to use and my apathy of late with tomato sauce, I tried something different.  Not too creamy and not cheese based like Alfredo {cheese sauce with sausage just sounded like it would drop straight to the bottom of my gut}, I made a thin sauce with chicken broth which was a perfect compliment.

Once the sausage has cooked, it is sliced then browned with onions.  This tends to leave lots of seasoned bits stuck to the pan.  But those bits come off easily when a sauce is made in the same pan, and they help flavor the sauce.  The flavor is not intense, like a tomato sauce can be, but it the mildness with the pasta and sausage makes quite a delicious dish.  Actually, it is one that we have not had leftovers of because it is so well liked.


Sweet Italian Sausage Pasta
1 lb sweet Italian sausage links {about 6 links}
1 small sweet onion, chopped
1/4 cup butter
1/3 c flour
3 c chicken broth
1 1b box short pasta {such as cut fusilli, penne or even egg noodles}
fresh parsley, chopped {for garnishing}
fresh ground salt and pepper, to taste

Place sausage in skillet and add water to reach half way up sausage. Heat to simmer and cook til water is evaporated; turn sausages over and add water to half way up sausages again. Simmer til water is evaporated again. Remove sausages and slice into circles. Return sausages to frying pan and add chopped onion; cook over medium~high heat til sausage is browned and onions are tender. While sausages are browning, begin pasta and cook according to package directions.

Reduce heat to medium and add butter to skillet; melt and stir, scraping up bits of sausage stuck to pan. Sprinkle sausage and onion with flour; stir. Slowly stir in chicken broth, scraping skillet. As you add the broth, you will find the bits scrape easily off the skillet. These bits season the sauce nicely. Once sauce begins to simmer, continue to simmer for 5 minutes to slightly thicken sauce. Remove from heat and keep covered.

Drain pasta. Add sausage and sauce; combine. Garnish with fresh chopped parsley.

Tips and Tricks~
*Prepare sausage ahead of time up to the browning point. Slice and refrigerate or freeze. When you want to make this dish, pick back up at the browning point. I love preparing ingredients ahead of time. The grocery stores have caught on to that; they sell all types of prepared ingredients in nice packages.
* Use a metal skillet, not a non~stick one. The sausages will wreak havoc on non~stick pans and the metal pan will easily clean up, especially after scraping the bits off while adding the broth.
*This dish is excellent with a side of roasted Brussels sprouts. Place sprouts on a cookie sheet and toss with olive oil and coarse salt. Roast for 20 minutes in a 400F oven.


Pin It

Lucky Purses

Print Friendly Version of this pagePrint Get a PDF version of this webpagePDF

As I posted earlier this week, at our house we have started making Chinese food instead of getting take out.  Mostly we do this to avoid headaches and the cost, but the food really isn't difficult to make, and I've learned to make some dishes rather well.

When we did frequent restaurants, we tried P.F. Chang's a few times.  I honestly don't remember what their food was like, it didn't overwhelm me in either way of yum or yuck.  Except for one thing, a dessert called Lucky 8.  I tasted it twice but on one of our last visits, to my disappointment, it was no longer part of the menu.

For a few years I have thought about recreating the Lucky 8.  As I recall they were eight sticks made of thin spring roll dough filled with chocolate and served with a peanut butter caramel sauce and toffee bits.  I thought about how it would be difficult to fill and roll a thin stick of chocolate.  But an idea came to me, mostly inspired by images I've seen floating around the web of Hershey kisses baked inside of wonton wrappers.

I changed the order of fillings and sauce and decided on using Rolos, caramel filled chocolate candies, inside a dumpling wrapper.  A sauce of melted peanut butter and chocolate would accompany the little purses.  The name comes about from the gifts given to children on Chinese New Year.  Red envelopes are filled with money, an even amount is considered lucky {8 is the most common lucky number}.  Thus, these little tasty bites are named lucky purses.  Make some, perhaps more than eight.  They are easy and come together rather quickly.


Lucky Purses
Rolos candies, unwrapped
dumpling wrappers {recommend Shanghai style for a thinner crust}
small bowl of water {for moistening wrappers}
vegetable oil for frying
1/4c creamy peanut butter
1/2 c semi~sweet chocolate chips
toffee bits


Heat oil in small sauce pan over medium heat to about 325F.  While oil is heating {it will take a 5-10 minutes}, form purses.

Place number of wrappers needed {8-16} on a damp paper towel and fold paper towel over top to keep dough moist.  Place a wrapper on your hand, add a Rolo to the center of the wrapper.  Moisten the edges of the wrapper.  Bring edges together over the Rolo; press in side edges, then squeeze to keep together and form the purse.  Set aside while forming remaining purses.


Fry purses in hot oil for about 1 minute.  You want the dumplings to be golden but not burnt {they will cook quickly}.  Remove to plate lined with paper towels to remove oil.  Make sauce.

Place peanut butter and chocolate chips in a small sauce pan and heat over low heat to melt.  Stir frequently; once chips are melted, remove from heat and stir.  Spoon into serving ramekin.

Place lucky purses on a small serving plate and sprinkle toffee bits around them.  Place ramekin of chocolate peanut butter sauce on same plate.  Dip a lucky purse in the sauce then dab on toffee bits.


Pin It

Easy Fried Rice

Print Friendly Version of this pagePrint Get a PDF version of this webpagePDF

Everyone in my family enjoys Chinese food but we don't like the headache and puffy hands and face that often come later from the high MSG content in most restaurant Chinese food. I've learned to make dumplings or wontons, spring rolls and now the best fried rice. I especially like to have our Chinese 'make~in' around Chinese New Year {which is January 23 this year}, complete with chopsticks and tea and a bright red table covering.

Why red?  The holiday has its roots in a myth that a monster, Nian, would come on the eve of the new year and eat animals and even children.  To keep him appeased, villagers would set out food on their doorposts.  Once someone noticed a child wearing red running toward the monster, and it was terrified and ran off.  It was decided that red would scare Nian away.  Today children receive red envelopes filled with money as gifts on the Chinese New Year.


So what about the food?  Often the feasts in China include chicken and fish, dumplings and mandarin oranges as well as some sweets like Chinese rice pudding.  We just enjoy a festive occasion therefore we eat  some of our favorite, very Americanized Chinese dishes, like fried rice.

Tips and Tricks for No Fail Fried Rice~
*The key to fried rice is using cold, day old rice.  Make your rice at least one day ahead and use it to make this no fail recipe.
*Use sesame oil, not vegetable or canola or another.  The only seasoning you need for this recipe comes from the sesame oil and the soy sauce.  And they are the only seasoning you need.
*I prefer white rice in this dish.  Before I actually made fried, I thought the brown color came from brown rice.  After making it I learned the color is from the soy sauce.
*This is wonderful even after it has been made and sits in the fridge for a day or two.  My children love it when I make extra so they can pack it for their lunches.
*Easily add pork, beef or chicken to the dish by sauteing the meat in sesame oil first, then add veggies with a bit more sesame oil.  Follow remainder of recipe as written.


Easy Fried Rice
2 tbsp sesame oil
2 c frozen mixed veggies
1/2 c chopped yellow onion
2 eggs, slightly beaten
3 c cold, cooked rice {recommend white}
1/3-1/2  c soy sauce {recommend low-sodium}
1/4 c sliced green onions

Heat sesame oil in large skillet or wok over medium~high heat.  Add veggies and onions and cook until onions are slightly tender.  Move veggies to sides of pan, making a circle in which to place eggs.  Lower heat to medium and add eggs; scramble in middle to slightly cook then mix with veggies.  Add cold rice and soy sauce {just 1/3 cup, use 1/2 cup if you like the salty taste to come through more}; increase heat to high and stir fry to heat through.  Garnish with green onion slices before serving.


9ZBBPP78RDCA

Pin It

Coconut Chocolate Chip Bread

Print Friendly Version of this pagePrint Get a PDF version of this webpagePDF


I've had a fairly productive effort on making some of the things on my 'Looks Yummy' Pinterest board.  One recipe comes from Culinary Concoctions by Pea Body for Almond Joy Bread.  I wanted to make a treat for two of my college age children to enjoy on their flights back to school, and they both like almond joys, so I chose this.

Reading through the recipe and looking through the pantry caused me to make a few changes such as using coconut milk {I've had a can in the pantry for a year that I have not touched yet} and leaving out the coconut extract.  Once I started mixing I decided to add more coconut and chocolate chips and omit the almonds {I too love Almond Joys but do not enjoy biting into a nut in the middle of my soft dessert}.  Without the almonds it was no longer Almond Joy, but I rather like the addition of lots of coconut.

The result was quite delicious~ a golden, crunchy outside with a moist and sweet coconutty inside.  I omitted the glaze from the original recipe.  I did make some with the remainder of the coconut milk but decided that I rather liked the crusty bread without the glaze.


Coconut Chocolate Chip Bread
based on recipe from Culinary Concoctions by Pea Body
4 eggs
2 c sugar
1 c canola oil
1 tsp vanilla
3 c flour
1/2 tsp baking powder
1/2 tsp baking soda
1/2 tsp salt
1 c coconut milk
2 c shredded sweetened coconut
2 c semi-sweet chocolate chips

Preheat oven to 350F.  Grease 2 loaf pans.
Combine eggs, sugar, oil and vanilla in bowl.  Beat on medium speed for 2 minutes.  Combine flour, baking powder, baking soda, and salt; whisk well.  Alternate adding flour combination and coconut milk, mixing well after each addition.  Fold in shredded coconut and chocolate chips.  Divide batter between two loaf pans.  Bake in preheated oven for 55-60 minutes.  Allow loaves to cool in pans before removing.


Pin It

Roast Chicken Chopped Salad~ Make Ahead

Print Friendly Version of this pagePrint Get a PDF version of this webpagePDF

Roast chicken chopped salad, it is so delicious, but I do not make it often enough.  Even though it is a relatively simple meal, it is somewhat time and attention consuming with all the preparation.  Since it is a salad that is rather enjoyable chilled, it makes an excellent make ahead meal.

The combination of vegetables and roast chicken make this salad really scrumptious.  The simple technique of roasting chicken that still has the bone and skin intact gives a delicious and juicy piece of meat without a fuss, just a bit of salt and pepper are the only seasoning necessary.  The trick is to leave the skin on after it has roasted and rested for a bit.


Once you have cooked and prepped all the ingredients, assemble them in a container that can be sealed~ a glass bowl that can be covered tightly with plastic wrap or an air tight storage bowl.


Why make a salad ahead of time?  Most of the work of making a fine salad is the preparation of the ingredients, which can drain your zeal for sitting and being sociable while enjoying your work.  Preparing the ingredients ahead of time allows you to make it for~
* a dinner party
* lunches {store in individual size containers with dressing separate}
* dinner for the next day
Serve with a crusty loaf of bread and butter to complete the meal.

Roast Chicken Chopped Salad
2 chicken breasts with ribs and skin intact
salt and pepper
2 hearts of romaine
3 ears of corn
6 oz goat cheese
1 lg English cucumber
2 roma tomatoes
3 green onions
1 c croutons
1/2 c dried cranberries
champagne vinaigrette {recipe follows}

Preheat oven to 375F.  Place chicken in shallow dish or roasting pan; sprinkle with salt and pepper.  Bake for 1 hour {continue preparing remainder of salad while chicken roasts}.  Remove from oven and let rest, with skin still intact, for 15 minutes.  Remove skin and allow meat to cool enough to handle.  Cut off bone and slice into strips.  Wrap in butcher or wax paper.

Bring a small pot of water to a boil; add corn cobs and cook for 5 minutes.  Remove from boiling water and submerge in ice bath for 2-3 minutes.  Remove from ice bath and slice corn off cob.  Place in baggie.

Chop hearts of romaine, rinse and dry.  Place in large bowl.  Crumble goat cheese; place in baggie.   Peel and dice cucumber; place in sandwich bag.  Dice tomatoes; place in sandwich bag.  Slice greens of onions; place in baggie.  Place croutons and cranberries in separate baggies.

Layer all ingredients in their separate bags on top of lettuce in bowl.  Cover bowl and store in refrigerator for a couple of hours or overnight.  Assemble salad by layering all ingredients and drizzling with vinaigrette.  Toss lightly and serve.

Champagne Vinaigrette
1/2 c champagne wine vinegar
1/3 c grape seed oil
2 tbsp dijon mustard
1 tbsp sugar
1/2 tsp pepper

Put all ingredients in a jar; shake vigorously.  Serve over chopped salad.


Pin It

Peaches and Cream French Toast~ Make Ahead Breakfast

Print Friendly Version of this pagePrint Get a PDF version of this webpagePDF
I find it important to send the family off for the day with their tummies filled with good food.  It sets the tone for the day.  Unfortunately, more often than not lately, they have their tummies filled with cold cereal.  But with a bit of planning, I will change this.  And this is how I plan to start the change.


Peaches and Cream French Toast is an absolute favorite with my children and husband.  As with most make ahead breakfast recipes, this comes from my favorite bed and breakfast cookbook, Recipes From the Watson House.  Most of the recipes call for the dish to be assembled the night before and placed in the refrigerator, then cooked in the morning.

All though it is a family favorite, I do have to admit I would prefer it without the peaches.  I am just not a cooked fruit fan {unless the fruit is berries}.  With that said, I do eat this picking around the peaches and just love it.  I think one day I will cook this without the peaches and serve the cooked creamy toast with fresh peaches.  But, the whole reason for making this dish is to send the family off with their tummies filled with goodness and feeling peachy.

A sweet caramel made of melted butter and brown sugar is topped with sliced peaches.


Add cubed French bread and pieces of cream cheese.


Then pour a creamy mixture of eggs, half-n-half and vanilla over top.


Cover the dish, all the bread and cream swimming in the creamy sauce atop the ooey~gooey caramel, and refrigerate til morning.


You can hire a little helper.  I pay mine with bread crumbs.


Once cooked, the top gets crunchy. . .


But when you take a piece, the inside is all gooey goodness.


Peaches and Cream French Toast
1/2 c butter
1 c brown sugar
2 tbsp reserved juice from canned peaches
1 29 oz can of peaches, drained
1 French baguette, cubed
8 oz cream cheese, cut into small pieces
12 eggs
1 1/2 c half-n-half
1 tsp vanilla

Heat butter, sugar and peach juice in saucepan until bubbly.  Pour into a 13x9 inch casserole dish.  Scatter peach slices over caramel sauce.  Top with bread cubes then pieces of cream cheese.  Place eggs, half-n-half, and vanilla in blender; blend to combine.  Pour egg mixture over bread and cream cheese.  Cover and refrigerate at least an hour but preferably overnight.  Bake, uncovered, in 350F oven for 50-60 minutes.


Pin It