Single Serve Coffee Bags

Print Friendly Version of this pagePrint Get a PDF version of this webpagePDF


I don't often get a chance to enjoy regular coffee and I am about the only one who requests decaf it seems. I was thrilled when I found the single serve coffee bags at the grocery. What a wonderful idea, freshly brewed coffee that's single serve and without a special coffee maker. They are even portable. Genius!

The down side of the single serve coffee bags is the cost. For about the same price as a bag of coffee beans you get 19 cups of coffee. I discovered you can buy empty tea bags to fill with tea leaves. Why not ground coffee?


Why make single serve coffee bags?
*quicker than brewing a whole pot
*enjoy fresh coffee all day long with regular or decaf
*nice gift, share favorite coffee with freinds


How to Make Single Serve Coffee Bags
Purchase empty tea bags. I found these press and brew bags. They are simple to use, once filled, just seal with an hot iron by pressing for about five seconds. You could check with your local health food store or tea shop.


Grind your coffee of choice. Fill each tea bag with 2-3 teaspoons of coffee grinds.


I made an assembly line and placed the filled bags in a basket to keep until I was ready to seal.


Place bags in an airtight container. Self sealing canning jars are perfect. Add a label with brewing instructions. I like my coffee bags steeped for 3 1/2 minutes. I am certain it differs by brand and flavor. You may want test yours and give instructions to your liking. Include a jar of creamers and sugars. And a pack of stirrers.


Pin It

Cookie Cutter Pancakes

Print Friendly Version of this pagePrint Get a PDF version of this webpagePDF

It does not take much to make a day festive. Just a few cookie cutters and some pancake batter helped us to get in the holiday mood. I saw some cute pancake molds at Williams-Sonoma. I also saw the lack of money in my wallet. So I pulled out our cookie cutters, whipped up a batch of our favorite pancakes {recipe below} and heated up the griddle.

How to use your cookie cutters for pancakes.
*Heat your griddle or frying pan to about 325F. Place cookie cutters on hot griddle. Do not use plastic cookie cutters! {That should have been a no-brainer, right?} Only metal against the hot surface.


*Spray generously with nonstick spray, trying to get any curves and corners on the inside of the cookie cutter. Spoon batter into cookie cutter; it will spread to fill the shape.


*Allow pancake to cook, with mold in place, until nice and bubbly on top. Gently remove mold using a set of tongues {the metal cookie cutters will be hot}, then flip the pancake to finish cooking.


*Serve with powdered sugar, butter and syrup and some ice cold milk. :~)


Favorite Pancake Batter
1 1/2 c whole milk
1/4 c white vinegar
2 c flour
1/4 c sugar
2 tsp baking powder
1 tsp baking soda
1 tsp salt
2 eggs
1/4 c vegetable oil
2 tsp vanilla

Place milk in a large bowl. Add vinegar and let sit for a few minutes to 'sour'. Combine flour, sugar, baking powder, baking soda and salt in separate bowl. Whisk to combine. Add eggs, vegetable oil and vanilla to soured milk; whisk well. Add dry ingredients to milk mixture and whisk to combine.

Makes about 8 servings.

A Few Tips:
*The batter may be thinned slightly by adding a few tablespoons of water.
*Evaporated milk may be substituted for the whole milk; this works beautifully.
*Alternately, buttermilk may be substituted for the milk and vinegar.
*Combine all of the dry ingredients in a jar. Use a pretty ribbon to tie a card of instructions with a list of the wet ingredients and add a cookie cutter for a nice gift.


Pin It

Paper Cube Advent Jar

Print Friendly Version of this pagePrint Get a PDF version of this webpagePDF


I'm often tempted to buy the lift-the-flap Advent calendars at the store this time of year. I have only given in to that temptation once or twice, which means the children usually do not have an calendar to count down to Christmas. This year I decided to make one for the children but I decided to do so to help take the emphasis off of the gifts they might receive on one day and to focus more on the festive time of year.

Each day one child picks the correct cube by number from the jar. When the paper cube is opened, he discovers an activity for the day to be enjoyed with the whole family. Also, there is a small candy inside for him. Following is a list of activities for each day.


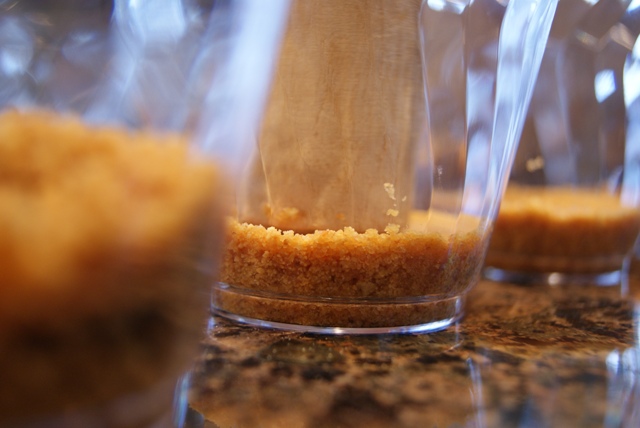
Paper Cube Advent Calendar
Materials
6 sheets {12"x12"} decorative paper
cube pattern
activity list
small candies {suggest Hershey Kisses or Reese's Minis}

Cut four cubes per piece of decorative paper. Simply hold the cube pattern on the paper as you cut around. Label all squares of one side of a paper cube pattern with the number which corresponds to the day/activity. On the wrong side {what will be the inside of the cube} write out the activity. Add a strip of double sided tape, or tape you have folded over on itself, to each flap. Fold on the dotted lines and secure with the taped flaps, tucking them inside the box.. Using a piece of tape that is folded over on itself allows you to make the taping invisible. Before closing the lid to the cube, insert a small candy if desired. Place the paper cubes in the jar beginning with cube 24. Continue adding, finishing with cube 1.

Activity List
1. Enjoy hot chocolate with a bar of toppings while decorating the tree. {Include crushed candy canes, flavored syrups, nutmeg and cinnamon, and whipped cream.}
2. Make paper stars to decorate mantel with garland of green. {Martha Stewart has a tutorial for making paper stars.}
3. Make orange clove balls as gifts for teachers. {This link shows some beautiful examples of designs on oranges you could duplicate.
4. Attend a performance of The Nutcracker.
5. Make birdseed biscuits in festive shapes using cookie cutters and hang with bright holiday ribbon. {Here's a way to make them in festive shapes using cookie cutters, like snowflakes.}
6. Set out nativity and read Luke 2.
7. Read A Christmas Carol.
8. Make popcorn balls and save for movie night. {This is a tried and true recipe for popcorn balls.}
9. Watch favorite version of A Christmas Carol.
10. Make bags of treats for neighbors.
11. Take a carriage ride.
12. Make crystal snowflakes. {Here is a step-by-step.}
13. Plant winter bulbs for indoors {amaryllis or paper whites}.
14. Make snowman cupcakes and enjoy with a cold glass of milk.
15. Make white chocolate dipped candy canes and package with hot chocolate mix as a gift for cousins.
16. Watch a funny holiday movie.
17. Candle Light Tour {Check with historical homes in your area.}
18. Make edible Christmas tree and enjoy while playing a game.
19. Make stained glass cookies using hard candies and sugar cookie dough. {Here is a recipe.}
20. Go ice skating.
21. Have a car ride picnic of hot sandwiches and hot cider while viewing Christmas lights. {I love these sandwiches.}
22. Camp out around Christmas tree and share favorite memories.
23. Make a sugar cookie nativity using animal shaped cookie cutters.
24. Have a fondue party for dinner.


A Few Notes
When I created this list, I kept in mind the day of the week and time of month in relation to Christmas Day and school breaks. For example, I have making orange clove balls on a Saturday at the beginning of the month as a gift for teachers. You may want to adjust the list according to your schedule.

Also, check your local listing for carriage companies. I found that one was giving free carriage rides on two different dates in our area. Another fun activity would be to visit caverns. The caverns stay about the same temperature year round so that is is warmer underground int he winter than above.


Pin It

Cranberry Brown Sugar Muffins

Print Friendly Version of this pagePrint Get a PDF version of this webpagePDF


What a nice treat to wake up to on a crisp fall morning, Cranberry Brown Sugar Muffins. Sweetened with dried cranberries and brown sugar. Topped with raw sugar for a slight crunch to compliment the fluffy inside. They don't take long to put together and bake so not much effort needs to go into preparing them for breakfast.


Cranberry Brown Sugar Muffins
based on a recipe from allrecipes.com
1/2 c butter, softened
1 c brown sugar
2 eggs, room temperature
1 tsp vanilla
1 c sour cream
2 c flour
1 tsp baking powder
1/2 tsp baking soda
1/2 tsp cinnamon
1/4 tsp salt
1 c dried cranberries
raw sugar for topping

Preheat oven to 375F.
Cream butter in sugar. While butter and sugar are creaming, combine flour, baking powder, baking soda, cinnamon and salt. Whisk to combine. Set aside. Add eggs and vanilla to creamed butter and sugar; blend well, scraping sides of bowl. Fold in sour cream. Fold in flour mixture. Fold in cranberries. Use an ice cream scoop or a 1/4 cup measure to fill 14-16 paper lined muffin tins. Sprinkle tops of unbaked muffins with raw sugar and bake for 18-20 minutes.


Pin It

Pumpkin Pie in a Cup

Print Friendly Version of this pagePrint Get a PDF version of this webpagePDF

What's better than pumpkin pie? How about pumpkin pie with whipped cream and cream cheese? And to top that, what about a no-bake recipe? I have been making a double layer, no-bake pumpkin pie for almost 20 years now, and there are never any leftovers.

Many of you have probably made the no-bake double layer pumpkin pie. You blend cream cheese with whipped topping and spread that on a graham cracker crust, then top it with a mixture of pumpkin and vanilla pudding. Mine is better. A couple of the adaptions I have made to the original recipe is using more cream cheese and freshly whipped cream, no frozen topping.

A few days ago, I thought of a way to improve it. Just make it portable! I made these as treats for my children's classmates for a Thanksgiving feast. Placing them in plastic cups allows you to place them in a plastic bag which can then be tied closed. Don't forget to send a spoon so this treat is ready to be devoured. And it will be. Trust me. I know.


Another plus, these can be made gluten free. Simply leave out the graham cracker layer and make certain to use Jell-O pudding mix. The label on the box doesn't say it is gluten-free, but check the ingredients and have a look at this statement from Kraft {maker of Jello-O pudding mix}.

These would be great for the children on Thanksgiving Day. While adults are enjoying their pie and coffee, the children could grab a pumpkin pie cup and spoon, then head outdoors to enjoy.

Pumpkin Pie in a Cup
2 c graham cracker crumbs
1/2 c {1 stick} butter, melted
1 1/2 cup whipping cream
8 oz cream cheese, softened
1 tsp vanilla
1 tbsp sugar
1 1/2 c cold milk
2 3.4 oz pkg Jell-O Instant Vanilla Pudding Mix
1 15 oz can pumpkin puree
1/2 tsp ground ginger
1/2 tsp ground cinnamon
1/4 tsp ground nutmeg
1/8 tsp ground cloves

Pour melted butter over graham cracker crumbs. Stir to combine. Divide among 12 clear plastic cups {6-9 oz size}; press into bottoms of cups. Allow to cool.

Pour whipping cream into bowl of stand mixer; whip until holds shape {about 5-7 minutes}. Cream the cream cheese until smooth and lacking lumps. Add vanilla and sugar; blend to combine. Fold whipped cream into cream cheese mixture. Spoon onto graham cracker crust in cups.

Combine cold milk and pudding mix using a wire whisk. Add canned pumpkin and spices; whisk to combine. Top whipped cream layer of cups with pumpkin pudding mix. Refrigerate for at least an hour or until serving. Makes 12 pudding cups.

Some Helpful Notes
*Use a pestle to press the crumbs in a cup to form the crust.
*A small cookie scoop is helpful in placing the cream mixture onto the graham cracker crusts. I put about 2 1/2 scoops in each cup {probably 2 1/2 tablespoons}.
*Use an ice cream scoop to put the pudding mix in each cup, about 1 1/2 scoops for each of 12 cups. Then slightly shake cup side to side and tap, repeat~ shake, tap, shake, tap. This will settle the pie in the cup nicely.
*If you would like to make this into a pie, spread the cream mixture into a graham cracker crumb pie crust then top with the pumpkin pudding layer. Refrigerate for at least an hour before serving.

Savory and Sweet Corn Bread Stuffing

Print Friendly Version of this pagePrint Get a PDF version of this webpagePDF


Stuffing or dressing? Inside or out? As a child, I had never had stuffing. My mother always made dressing. Even when she made Stove Top Stuffing she called it dressing. Do you know the difference? As the name implies, stuffing is used to stuff meat, usually a whole bird for roasting. Dressing is synonymous with stuffing but is more often to refer to the method of cooking outside of the bird. Also, depending on the geographic location; stuffing is more often used in the the South and East. I prefer dressing to stuffing mostly because it is what I am used to eating and saying, though my favorite recipe is for a stuffing.

Here is my favorite stuffing recipe. It is sweet due to using sweet corn muffins and it is savory with bits of sausage and mushrooms. My children even like this {as long as I remember to chop up the mushrooms and resist the temptation to leave them in slices}. It could even be a meal on its own. The recipe is based on one from a cookbook my mother gave me many years ago. Using fresh corn muffins makes it especially moist. I have never used it to stuff a turkey, but I am certain it would be just as delicious if it was cooked inside your turkey as it is in a pretty casserole dish.

Savory and Sweet Corn Bread Stuffing
8 oz sliced mushrooms
1 c chopped celery
3/4 c chopped onion
1/2 c butter
1 1/2 c hot broth {chicken is best}
1 lb pork sausage, browned and drained
1 8x8 pan sweet corn bread, crumbled

Melt butter in large skillet; add mushrooms, celery and onion and cook until onions are tender. Place sausage in large bowl; add cooked mushroom mixture and crumbled corn muffins. Add hot broth {if using bouillon cubes, boil water and add the cubes and allow to sit for 5-10 minutes before adding to sausage and corn muffins}. Stir to combine all ingredients. Place stuffing in 2 qt. baking dish. Bake uncovered in 350F oven for 30 minutes or until hot.

A Note~
I often use sweet corn muffins from Costco {which are much larger than regular muffins}; I'll use 4 of those which may be equal to about 6-8 regular.


Fruit Hand Pies

Print Friendly Version of this pagePrint Get a PDF version of this webpagePDF

My brown bag lunches that I took to school usually consisted of peanut butter and jelly {smushed was better because it blended the flavors} or bologna and cheese with an apple or banana if I was lucky and that was about it. Occasionally I might get a Hostess cupcake or Twinkie, like for my birthday. Brown bag lunches have evolved but my packing skills have not so much. My children would love to have some of these mason jar meals, but I haven't gotten that far in my evolution yet. One day, I hope. But until then, I simply try to add one special thing.

These are fruit hand pies. My four year old has been asking me for apple pies everyday for a while now, so I decided to make these as a treat for all of the children. No, these are not apple {I had cherry pie filling in the pantry to use up}, but any fruit filling can be used. They can be kept in the fridge or freezer and reheated, but they taste just as great at room temperature straight out of the fossilized brown lunch bag.


Fruit Hand Pies
double pie crust recipe {I use this one}
1 lg cans pie filling
1 egg
2 tbsp water
sugar

Preheat oven to 375F and grease a foil lined cookie sheet.
1. Divide dough into half or thirds; roll dough section into a rectangle about 15x10". Cut into six to eight squares. Place a tablespoon of pie filling in the center of each square. After wetting the edges of square, fold over and seal by pressing edges with a fork.
2. Mix egg and water together to make egg wash. Brush pies with egg wash and sprinkle with sugar.
3. Place pies on a foil lined baking sheet that is well greased with butter or nonstick spray. Bake 375F for 25-30 minutes.

Makes about 16 hand pies.


Pie Dough Making Tip: Use your stand mixer for all the steps of making your pie dough. Place flour and salt in mixer. Add butter which has been cut into thin squares. Then use the paddle attachment to slowly mix until the butter has been cut in and resembles small peas. Add cold water and mix again until the dough all lumps together. Now you can lightly knead the dough on your counter and your pie dough is ready to go!

Cauliflower Gratin

Print Friendly Version of this pagePrint Get a PDF version of this webpagePDF


I've been craving cauliflower and know that I might be the only person in history who has this craving. More precisely, I've been craving Bobby Flay's Cauliflower-Goat Cheese Gratin. I made this one year for Thanksgiving, and now it has become a favorite addition to our Thanksgiving menu (mostly by me). I bought a head of cauliflower but did not buy the goat cheese because I was feeling guilty about not using the remainder of the extra large container of feta. Deciding that feta is not much different than goat cheese (they are both creamy, white and a tad sour), I came up with my own recipe (because goat cheese wasn't the only key ingredient I was missing from Bobby's recipe).

This is truly comfort food, but probably not going to be the favorite at the children's table. It is a treat for the adults though. It has a wonderful smooth texture and beautiful color. Add a dash of nutmeg for a nice flavor. I enjoyed it with a sliced tomato for my lunch.


Cauliflower Gratin
1/4 c butter
1/3 c flour
1 c whole milk
1 c chicken broth
1/3 lb Monterey Jack cheese, cut into small cubes
2 c feta cheese crumbles, divided
1 head of cauliflower, cut into florets
1 c grated Parmesan
salt and pepper

Preheat oven to 400 F.

1. Bring a pot water to a boil and add cauliflower florets. Cook for 5 minutes. Drain and set aside.

2. Melt butter in a deep sauce pan. Add flour and whisk to combine well. Slowly add milk and chicken broth, whisking constantly to break up lumps. Continue to whisk slowly and heat to a simmer. Remove from heat. Sauce should have thickened.

3. Add Monterey Jack cheese and 1 cup feta crumbles to hot sauce and stir. Continue to stir until the cheese is mostly melted.

4. Place cauliflower florets into a shallow casserole dish, one sightly smaller than a 9x13 works best. Top with white sauce, 1 cup of crumbled feta and grated Parmesan. Season with salt and pepper. Roast for 25-30 minutes, until golden brown and bubbly. Allow to rest for 10 minutes before serving.